29.7. Exercises: Angular, Lesson 1
The following exercises walk you through the process of modifying existing components and generating new ones.
29.7.1. Starter Code
For this set of exercises, you will need a copy of the LaunchCode Angular projects repository. If you haven't done so already,
Fork the angular-lc101-projects repository on GitHub.
Clone your fork. If you need a reminder for how to do this, refer to the Git studio.
Navigate into the lesson 1 exercises now:
$ pwd
   angular-lc101-projects
$ ls
   lesson1 lesson2 lesson3
$ cd lesson1
$ ls
   exercises examples
$ cd exercises
The repository contains code but NOT the Angular modules necessary to launch
the webpage. In the terminal, run npm install to add these modules. Next,
enter ng serve and open the localhost URL in your browser.
The starter page should look like this:
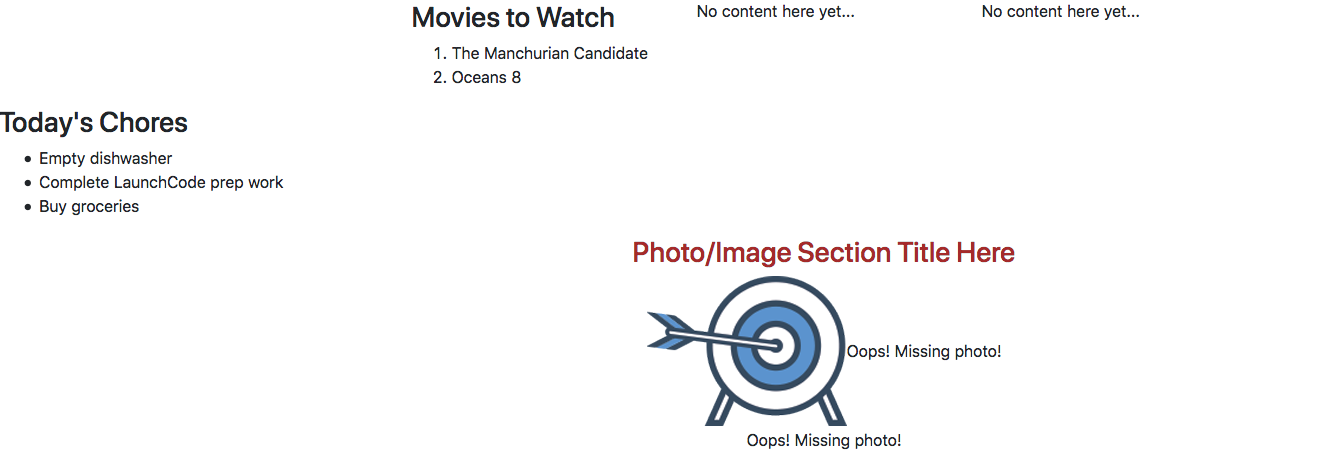
Starting set up for the exercises. Lots of content is missing.
The page is not pretty yet, but you get to fix that.
29.7.2. Part 1: Modify the CSS
The movie-list and chores-list components have been created, but so far
they appear pretty bland. Let's change that.
Change the movie list text by adjusting the code in
movie-list.component.cssto accomplish the following:The text for the heading and list items can be any color EXCEPT black. (HINT: Take advantage of the
moviesclass).The movie list should have a centered heading.
The font size should be large enough to easily read.
Change the chore list text by adjusting the code in
chores-list.component.cssto accomplish the following:Use a different font, with a size large enough to easily read.
The text color should be different from the movie list, but not black.
The chores list should have an underlined heading.
The chores in the list should be italicized.
29.7.2.1. Add More Movies
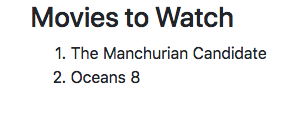
The list of movies is built using an array defined in
movie-list.component.ts:
export class MovieListComponent implements OnInit {
   movies = ['The Manchurian Candidate', 'Oceans 8'];
The titles in the movies array are referenced in the template
movie-list.component.html by adding placeholders in the HTML.
You can put almost any valid JavaScript inside the {{ }} in an Angular
template. For example, {{ movies[0] }} references the movies array,
and movies[0] returns the first item in the array.
1 2 3 4 5 6 7 | <div class="movies">
<h3>Movies to Watch</h3>
<ol>
<li>{{ movies[0] }}</li>
<li>{{ movies[1] }}</li>
</ol>
</div>
|
Using references in your HTML allows you to easily modify the content on your webpage. Instead of typing specific movie titles between the tags every time the list changes, references allow us to modify the data in one easy to find array.
Add two more items to the
moviesarray.Add two more
<li></li>elements tomovie-list.component.htmland use placeholders to reference the new movies in the array.
29.7.2.2. Complete the fav-photos Component
The
fav-photoscomponent has been generated, but it is incomplete. The page needs more images, which also need to be smaller in size.In the
FavPhotosComponentclass, assign a better section heading to thephotosTitlevariable.The
imagevariables should hold URLs for images, but only one is is filled in. Complete at least one more, which can be from the web or personal pictures. To copy the URL for an image on the web, right-click (or control-click) on the image and select the "Copy Image Location" menu option.In the
.htmlfile for this component, use placeholders in theimgtags to display your chosen images.<img src="{{placeholder}}" alt="Oops! Missing photo!">
Adjust the HTML to display one image per line.
Use the
.cssfile for this component to make all the images be the same size.Refresh the webpage to check the updated content.
Before moving on, save and commit your work.
29.7.3. Part 2: Add More Components
Note
You will be adding and modifying HTML elements for this project. If you need to review this topic, look back at the HTML Tags page, or try W3Schools.
The page needs a title.
Use the terminal to navigate into
appfolder.Generate the new component
page-title:ng generate component page-title
Open
page-title.component.tsand note that theapp-page-titletag has been defined next toselector. Shorten the tag name to justpage-title.In the
PageTitleComponentclass, define atitlevariable and assign it a string.Add an
<h1>to thepage-title.component.htmlfile. Use{{title}}as a placeholder for the title you defined. Style the text to be underlined and centered on the screen.Add the
<page-title></page-title>element toapp.component.html.Save all of your changes and refresh the page to see your new content.
The page needs a set of links to favorite websites.
Generate a
fav-linkscomponent. Openfav-links.component.tsand shorten the tag name to justfav-links.In the
FavLinksComponentclass, define the variablefavLinksand assign it an array that contains two or more URLs.In the
.htmlfile for this component, add a set of<a>tags for the web links. Each link should be on its own line.Inside each
<a>tag, set thehrefattribute equal to a placeholder for an element in thefavLinksarray:<a href = "{{placeholder}}">Link text...</a>
Add
<fav-links></fav-links>toapp.component.html. Save all of your changes, then refresh the page to see your new content.
Note
Opening the app.module.ts file shows that the components for the movies,
chores, title, links, and photos have all been automatically imported and
declared.
Angular automatically takes care of updating app.module.ts when you
generate new components. However, deleting a component does NOT remove the
references from the file.
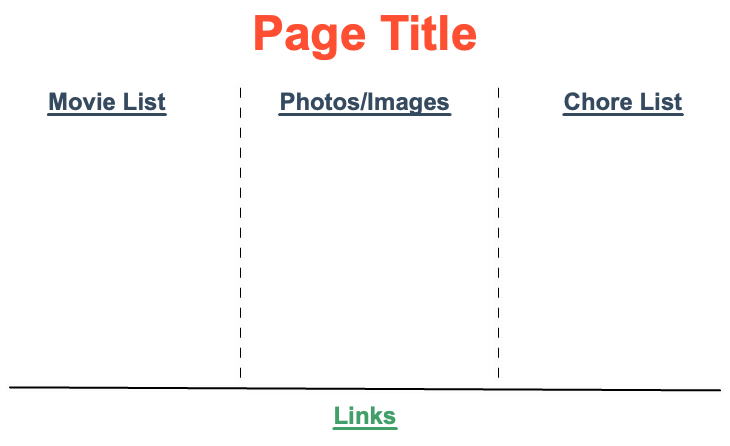
29.7.4. Part 3: Rearrange the Components
The content on the page appears quite jumbled, since we gave you no guidance on
where to put the custom tags in app.component.html. Fortunately, templates
allow us to easily move items around the framework.
Rearrange the tags
fav-photos,fav-links,page-title, etc. to create a specific page layout:app.component.htmlhas<div>tags to set up a three-column row. Use this to arrange the movie list, images, and chore list.Center the title at the top of the page.
Add a horizontal line below the three lists with the
<hr>tag.Center the links below the horizontal line.
Your final page should have this format (the dashed lines are optional):
29.7.4.1. Optional Final Touches
To boost your practice, complete one or more of the following:
Change the background to a decent color, image or pattern.
Add a border around one or more of the components on the page.
Add a fun, coding related gif to the page.
29.7.5. Sanity Check
The angular-lc101-projects repository contains two branches:
A
masterbranch with all the starter code for lessons 1, 2, and 3.A
solutionsbranch with completed code.
If you get stuck on a particular exercise:
Try again.
Try again again.
Ask your TA, instructor, classmates, or Google for tips.
Try again.
Take a break and give your brain a chance to rest.
Try again.
Feel completely justified in switching to the
solutionsbranch to check the code.
Note
If you jumped right to step 7, you missed out on a stellar learning opportunity.
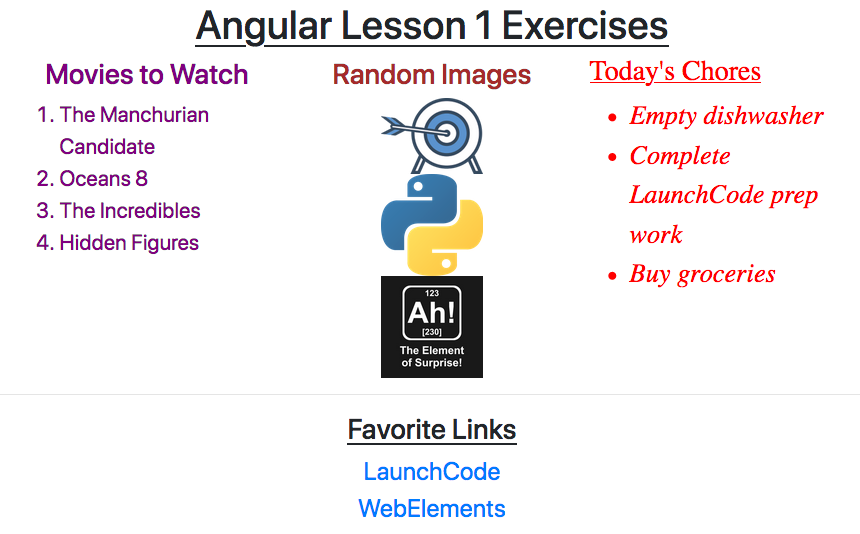
Customized and complete angular project example.